3 Secrets to a Spectacular Pie Crust
Pie crust makes or breaks the pie. Everyone loves a flaky, buttery pie crust with the perfect combination of crisp and melt. It’s the perfect partner to a sweet apple filling or a tangy berry filling. In contrast, a dry, tasteless crust reduces the quality of the entire pie. For this reason, the thought of creating your own pie crust can seem daunting. However, you are reading this article because you are brave enough to try. For your encouragement, you CAN make an incredible pie crust, and it isn’t as hard as you might think!

The spectacular pie crust
In particular, the crust in the recipe is spectacular. It’s the perfect balance of buttery, flaky, light, and crispy. Pie crust is an art. It’s much more about the feel of the dough than following the recipe to the letter of the law. In fact, I don’t measure dough ingredients anymore. After hundreds of pies baked in my lifetime, I know how the dough is supposed to feel for the right pie crust result. Don’t be discouraged if it’s not “perfection” on the first try. Continue to attempt to make homemade pie crust dough, and you will find the result is so amazing (and fast) that you won’t want to go back to store-bought alternatives.
There are a few secrets that will help you on your pie crust journey.
Secret 1: Flour & Water Balance
The first secret is the balance between flour and water. The dough should be soft to the touch and only just mixed. If your dough is sticky, you’ve added too much water. If your dough is crumbly, you’ve added too much flour. If you feel that you have added too much water, sprinkle more flour on the ball. If your ball is not sticking together and is crumbly, add more water. You can continue to adjust this balance until you have a soft, integrated ball of dough. (Note: add flour and water carefully and sparingly, as it also must be balanced with the butter.)
Secret 2: Don’t Over-knead
Over-kneading will lead to hardened, tough dough and a less flaky crust. The less the dough is kneaded and touched, but still made into a ball, the better the result. Don’t be afraid to still have chunks of butter inside your dough. They will melt when the dough is rolled out and cooked in the oven.
Secret 3: Don’t Re-roll
Thirdly, avoid re-rolling the dough. In general, dough becomes tough if it is rolled out more than once. Tough dough results in a less flaky and light crust. If you find that your dough has been messed up on the first attempt of rolling, it’s better to piece it together on the pie pan or start over completely on the dough. This may seem like a harsh response to a bad rollout, but it comes from years of experience. If you want to try to re-roll the dough, you will find it is much tougher than the first time. You can try to salvage the tough dough by adding more butter, however it’s difficult to recover the light, soft texture.
Buttery Pie Crust
Ingredients for Double Pie Crust (Top and Bottom Crusts)
2 ¼ Cups of All-Purpose Flour
1 tsp Salt
14 Tbsp of Butter (or ¾ Cups of Crisco)
12-17 Tbsp Ice-cold Water

Flour, salt, butter, and water
Instructions
1. In a bowl, mix flour and salt.
2. Slice butter into small bits and cut into the flour and salt with a pastry cutter. (If you don’t have a pastry cutter, you can use your fingers to squish the butter into the flour. The result should look clumpy.)
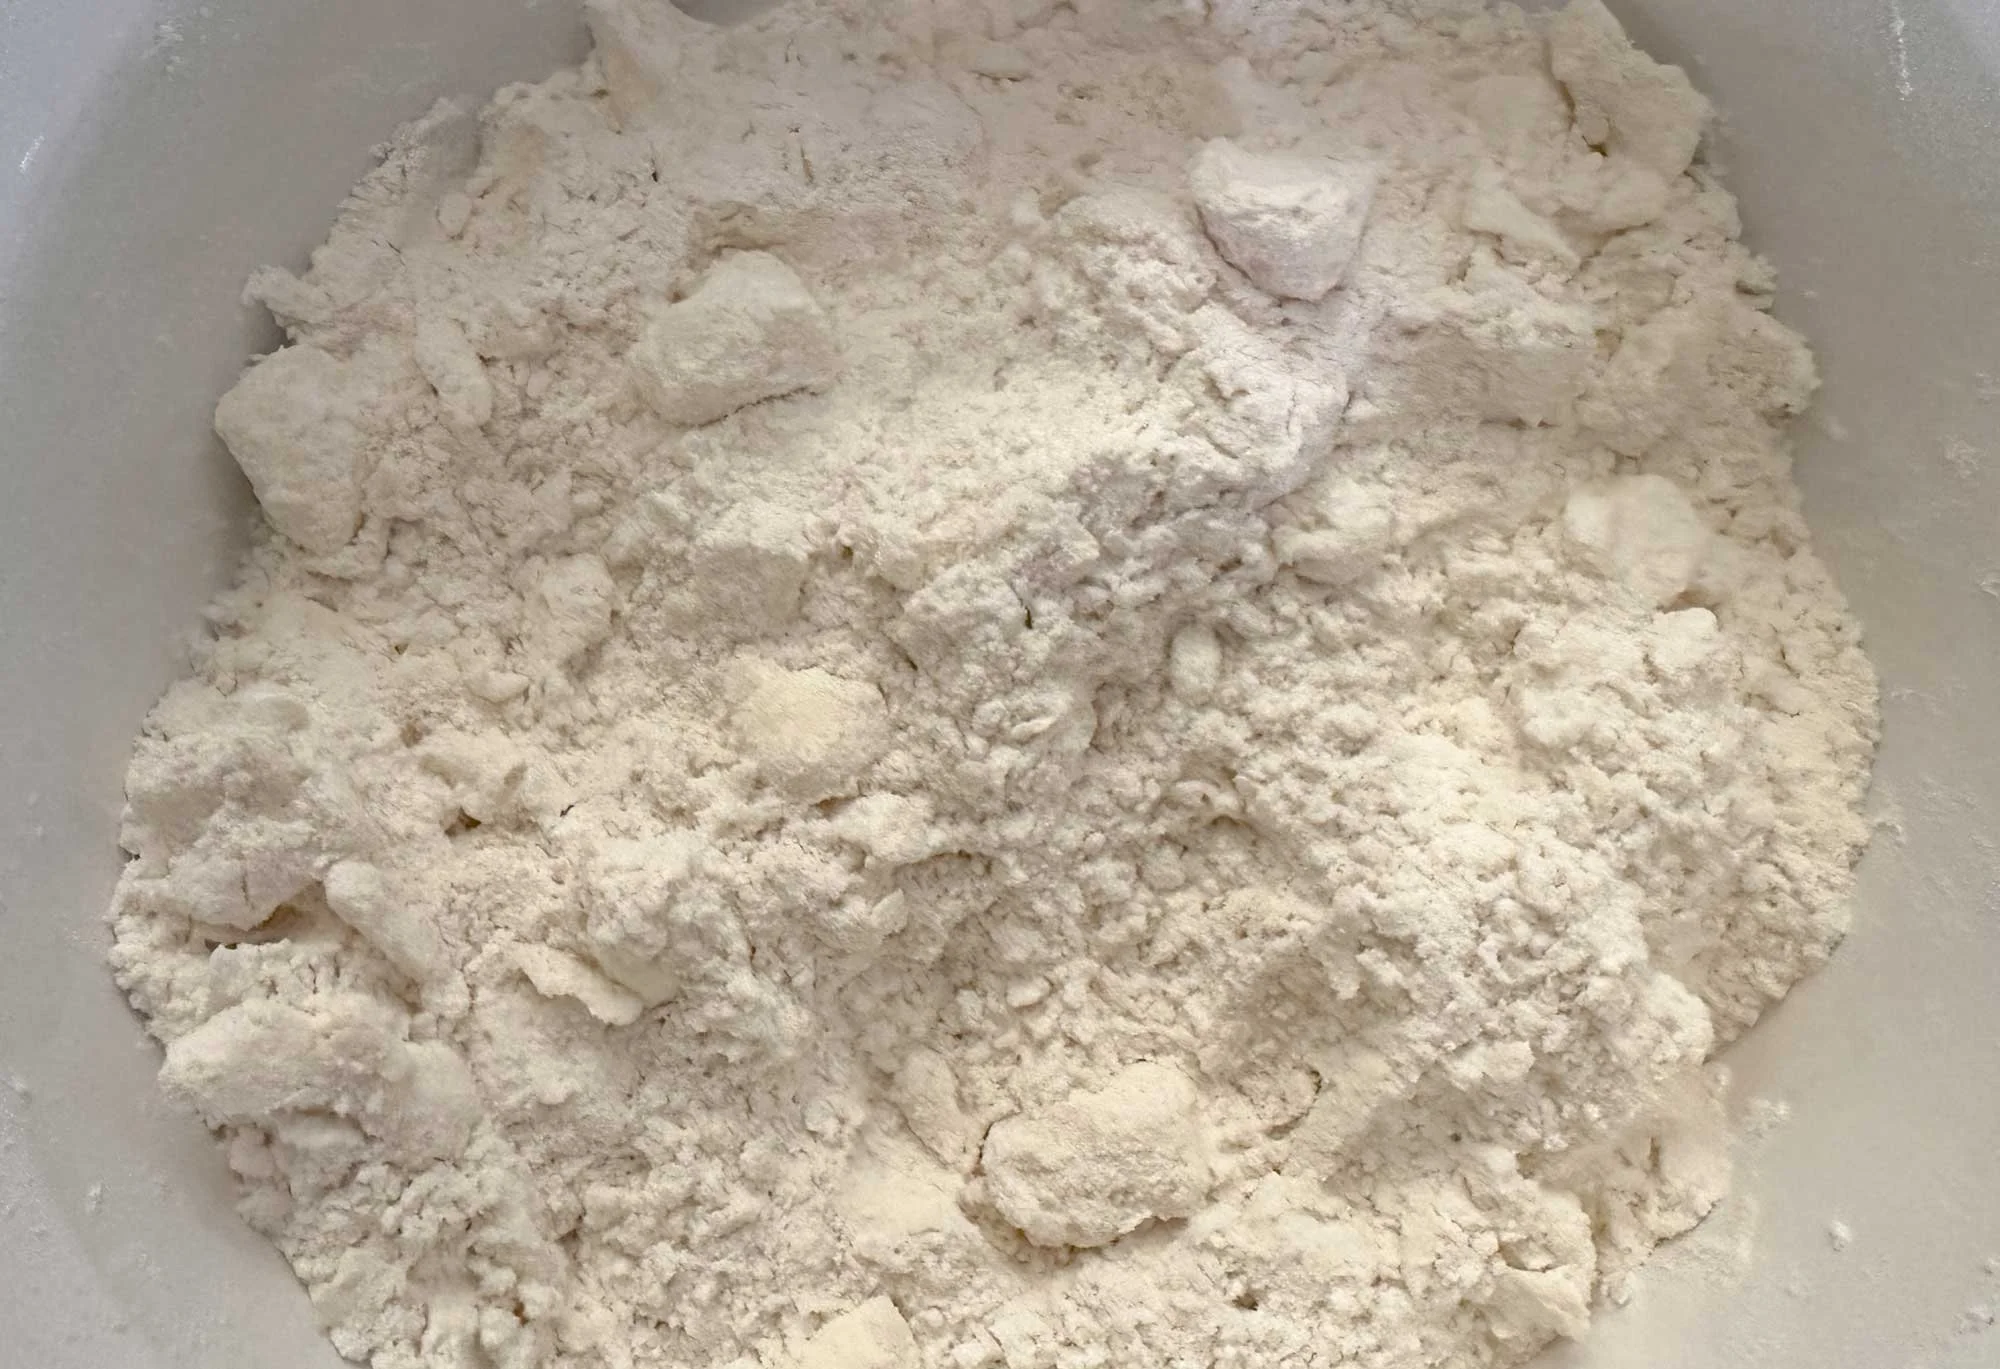
Cut the butter into the flour and salt until clumpy.
3. Add in tablespoons of ice-cold water. Start with 7 tablespoons and begin to knead the dough with your hands softly and loosely. Continue to add tablespoons of water until the flour and butter have molded into a soft ball of dough. (Remember, DO NOT over-knead.)
4. Sprinkle parchment paper or a clean flat surface with flour.
5. Split the ball of dough in two.

Split the ball of dough in two.
6. Roll one ball of dough into a thin circular layer on top of the flour.
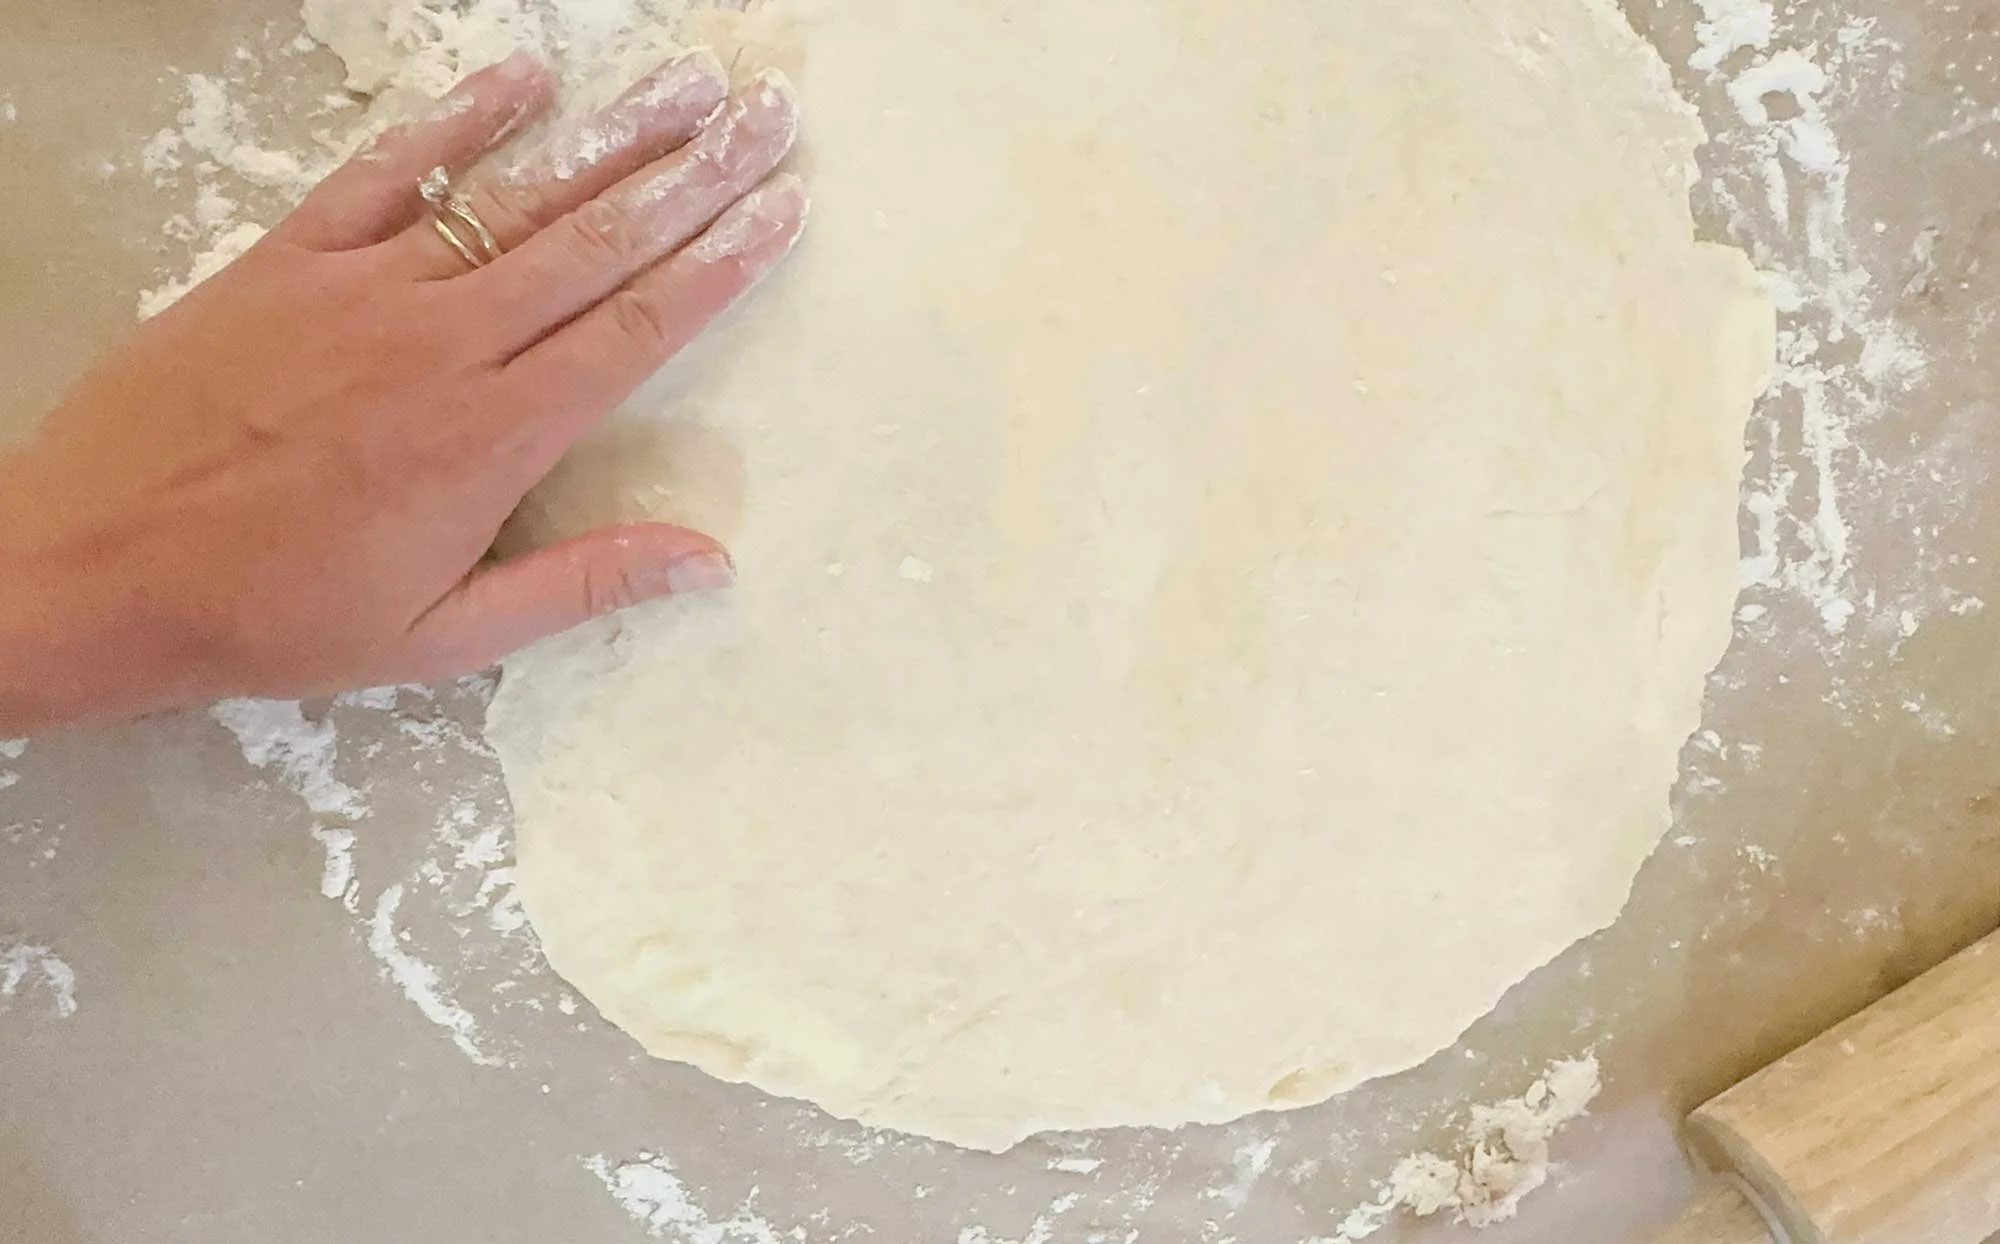
Roll one ball of dough into a thin circular layer on top of the flour.
7. To transfer onto the pie pan, fold in half and lift onto the first half of the pie pan. Flip the folded portion over onto the rest of the pan.
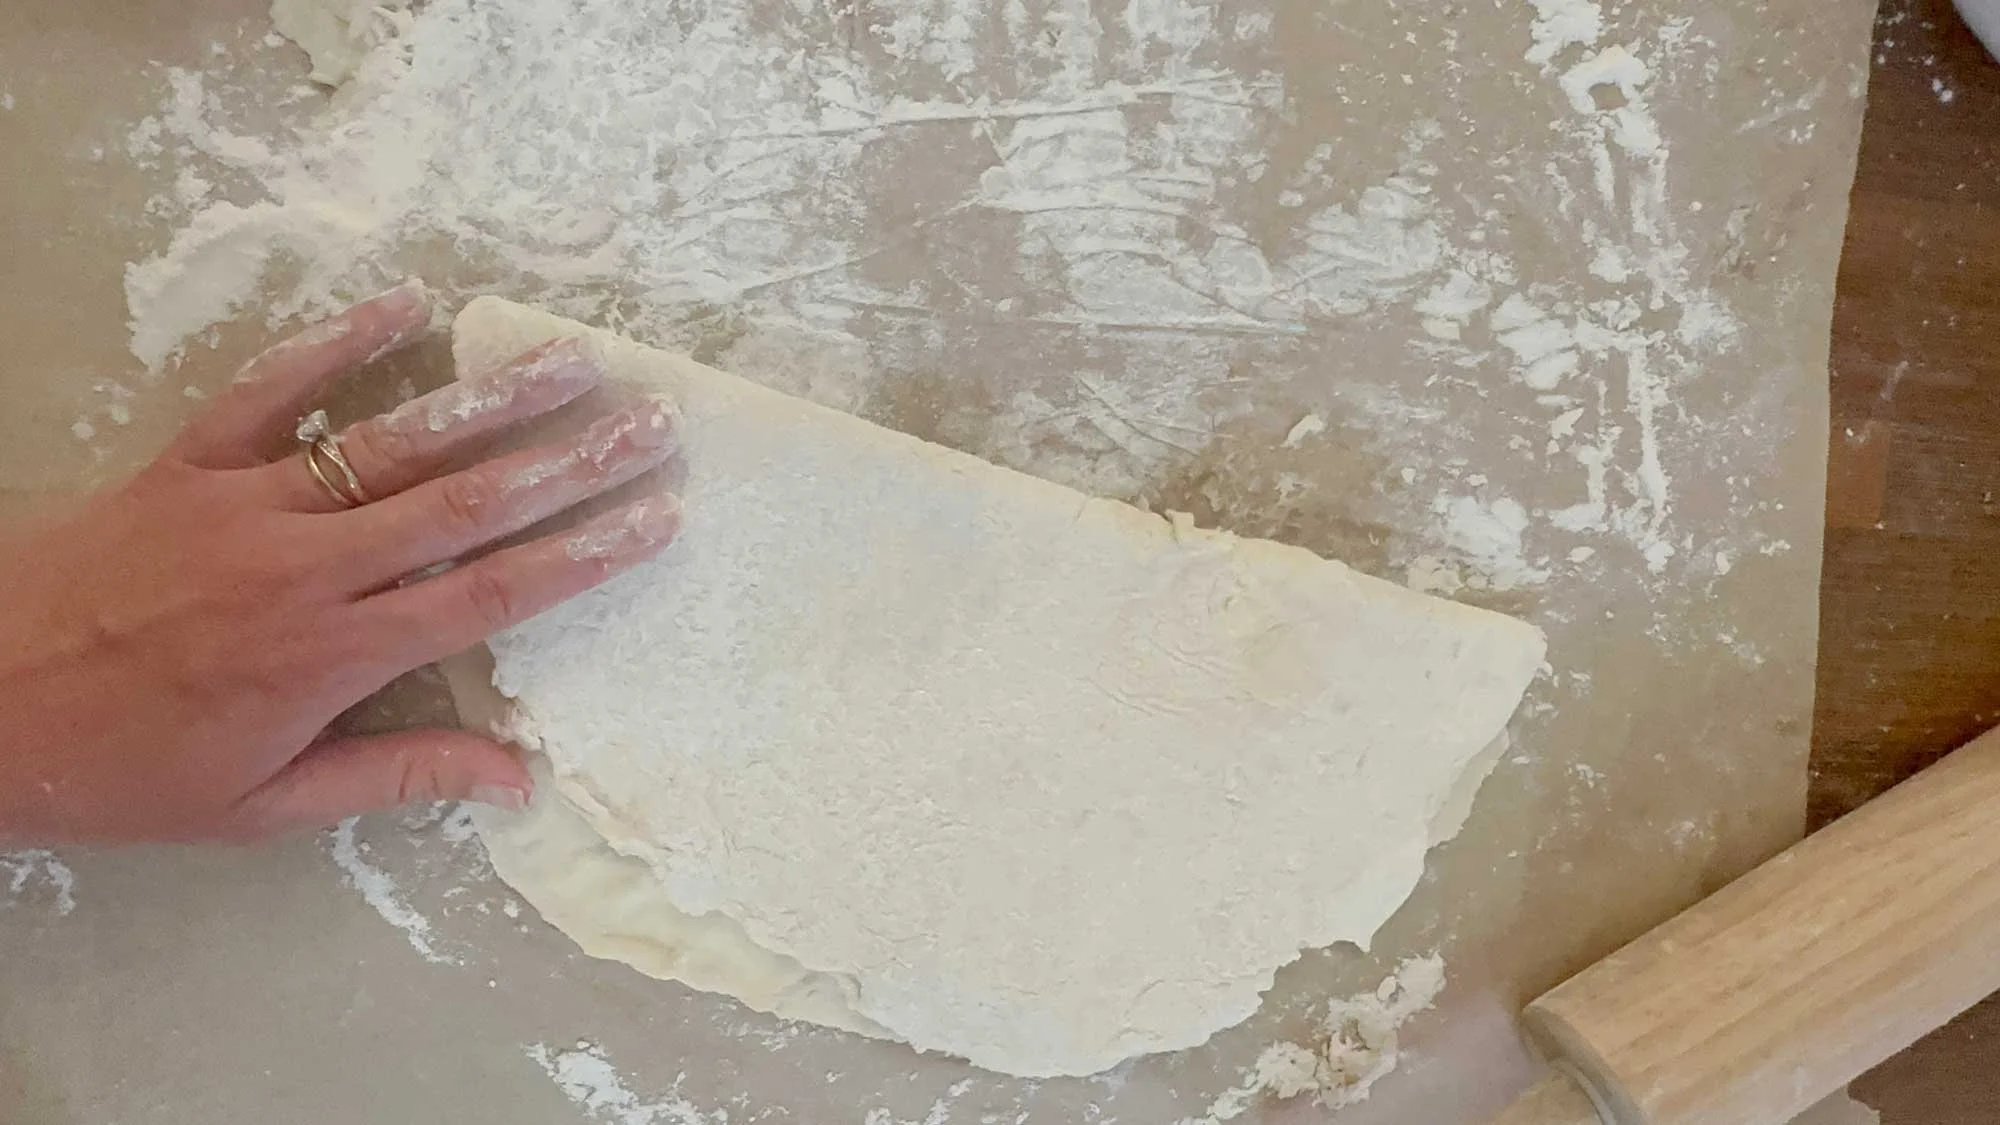
To lift the dough from the surface onto the pie pan, fold in half and lift onto one half of the pie pan.
8. Poke the bottom layer with a fork to minimize the development of air bubbles.
9. Pour in pie filling mixture. (Click here for the Country Apple Pie recipe.)
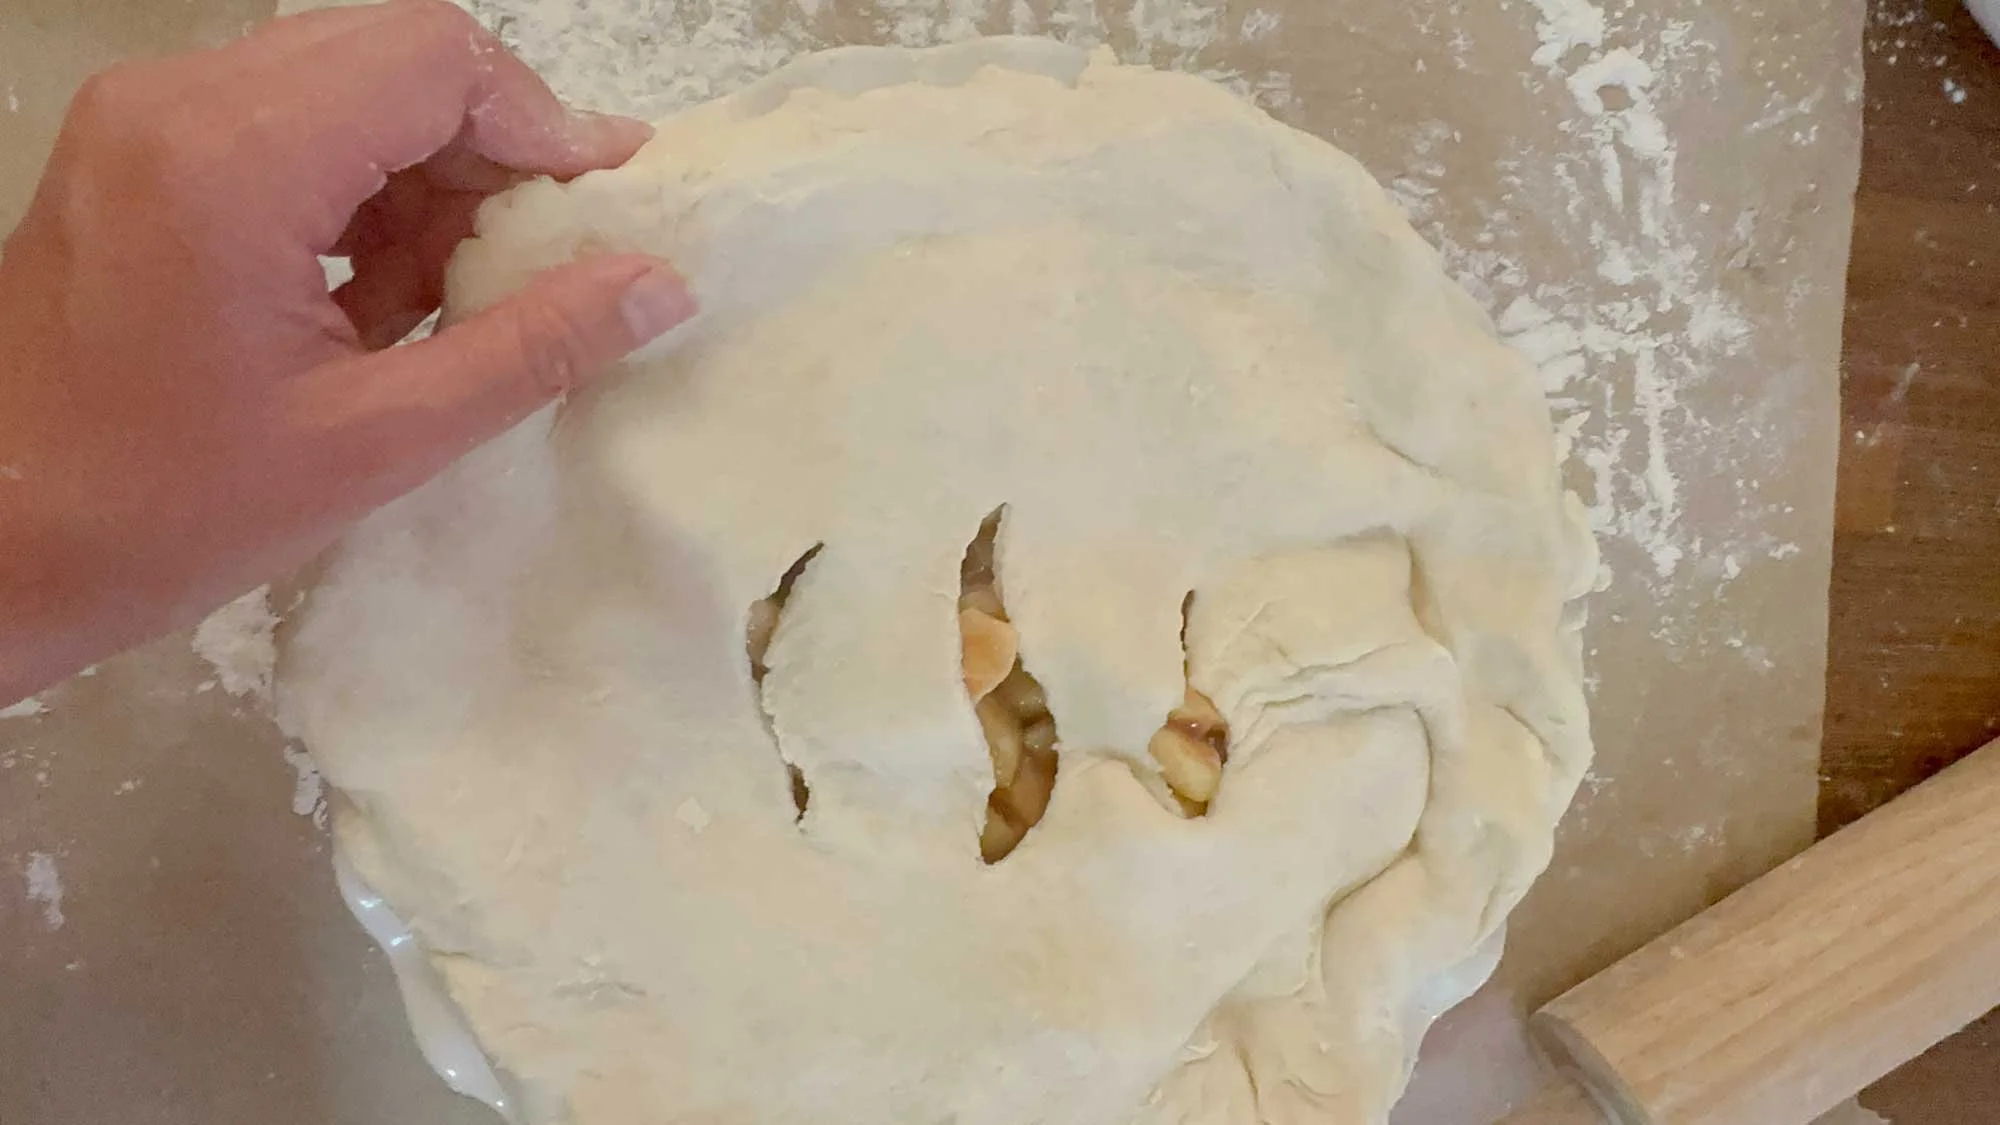
10. After the top dough layer has been rolled out, cut a simple design in the middle. This will allow the air to escape from the apple mixture as it bakes.
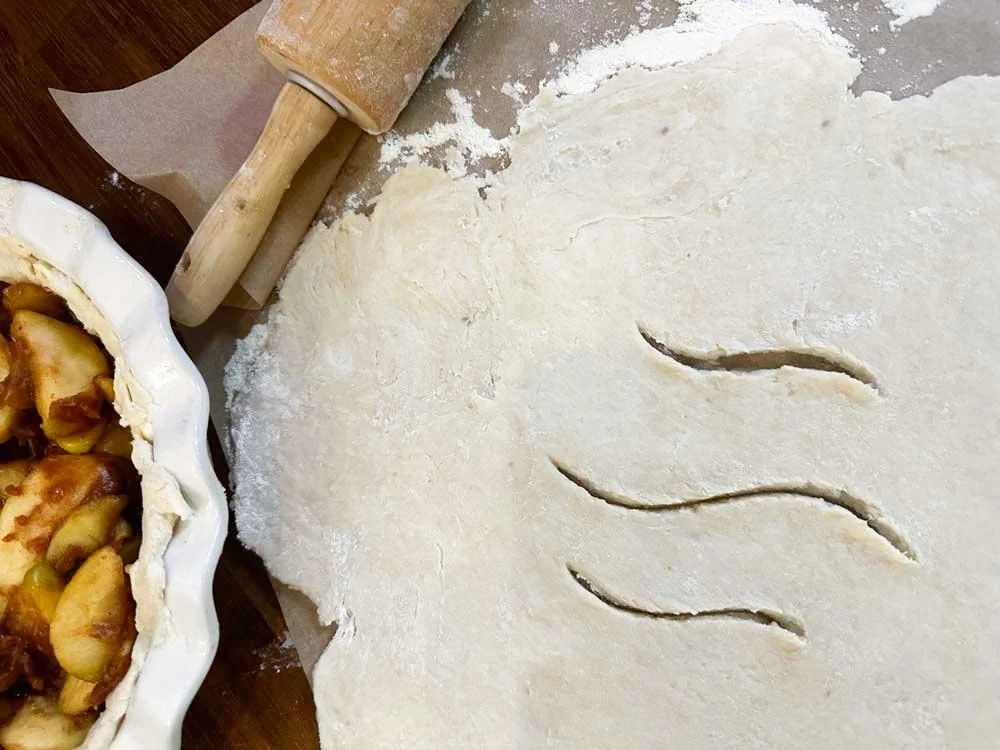
After the top dough layer has been rolled out, cut a simple design in the middle.
11. To lift the dough from the surface onto the pie pan, fold in half and lift onto one half of the pie pan. Then flip the folded portion over onto the rest of the pan.

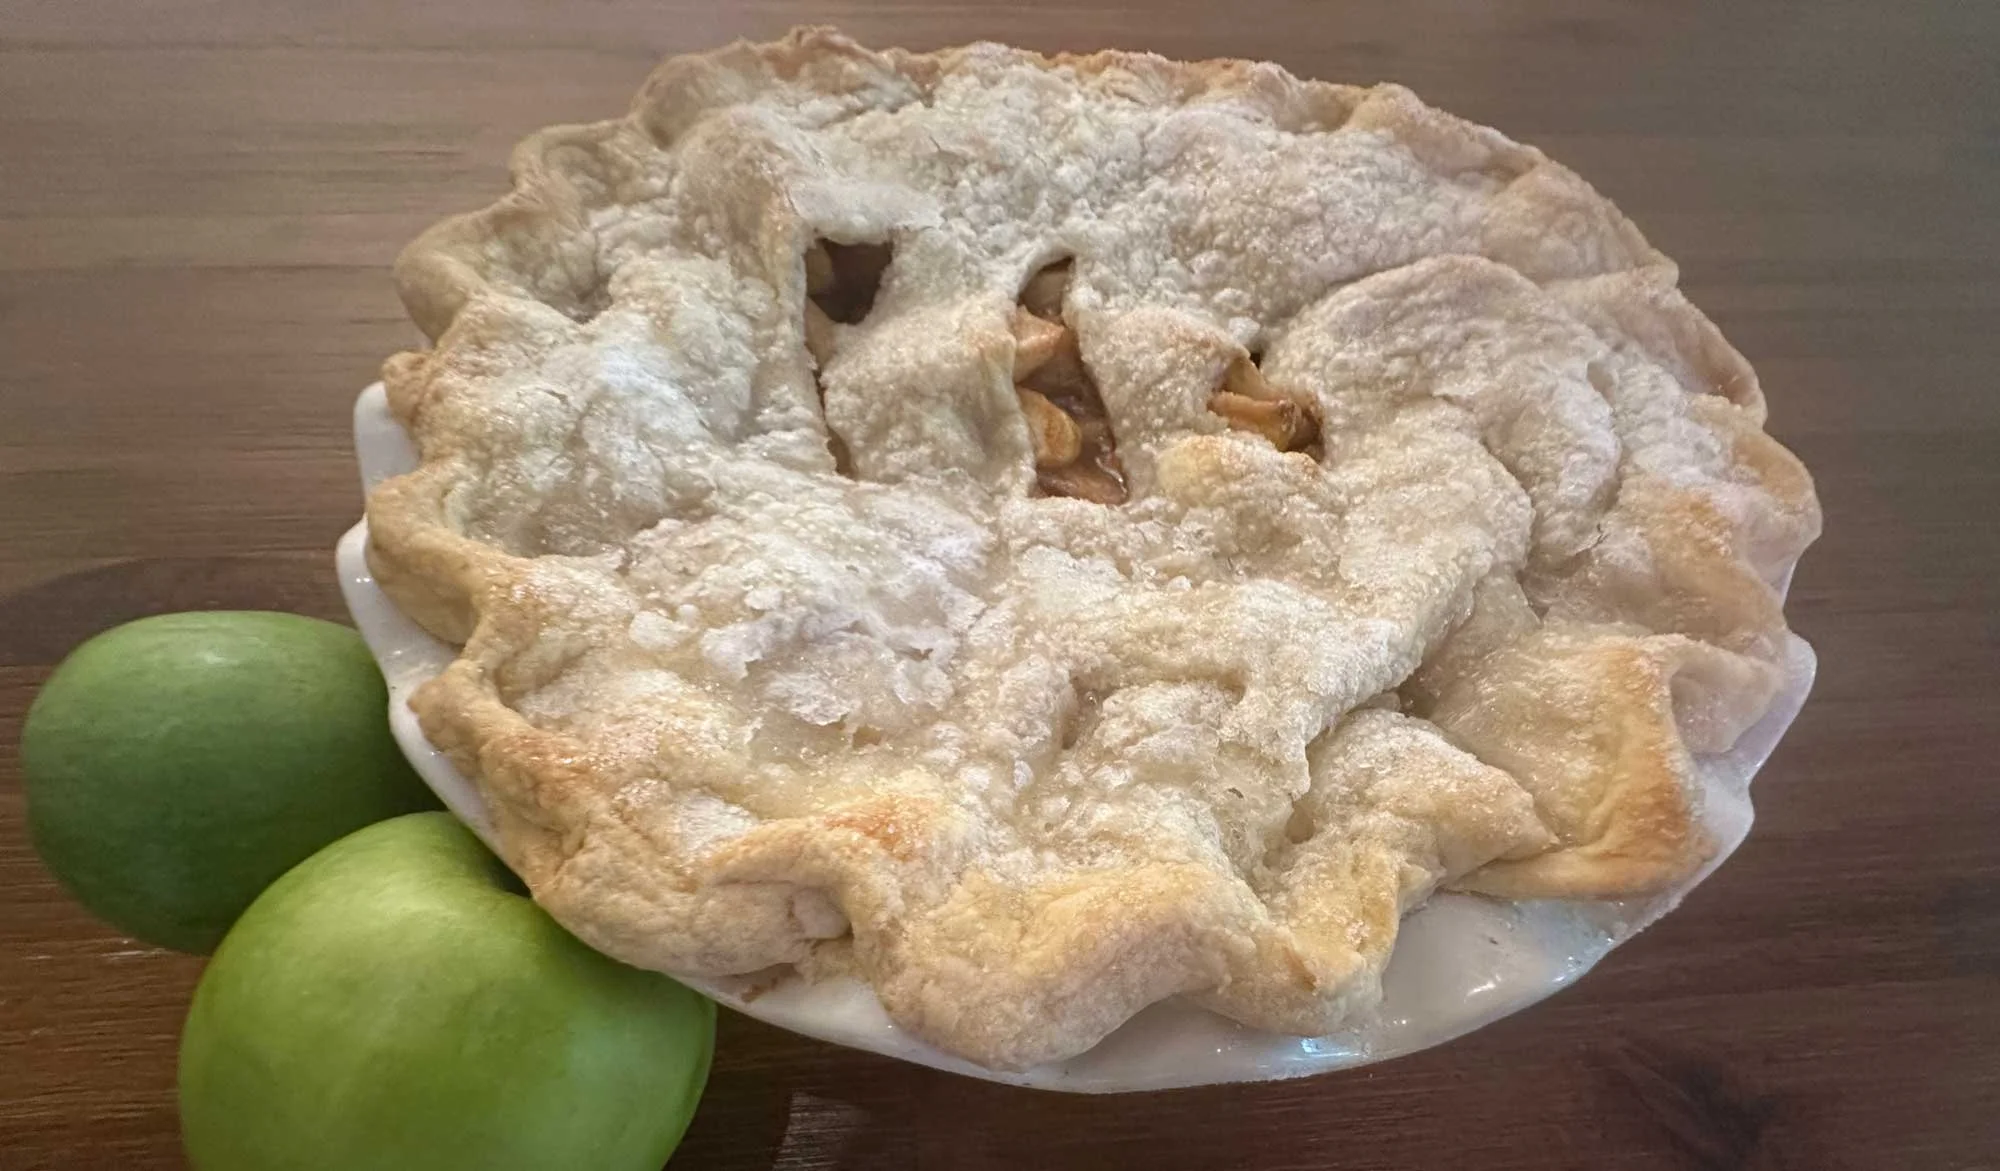
Country Apple Pie Crust
Country Apple Pie Crust
13. Decorate the sides of the pie by pinching your index finger with the other hand to create mounds of dough all around the side of the pie.

Decorate the sides of the pie by pinching your index finger with the other hand to create mounds of dough all around the side of the pie.
14. Brush milk on top of the pie and sprinkle white sugar on the top and sides, creating a crystal, flaky crust after baking.
15. Bake for 25-30 minutes at 350°F or until golden brown.
Country Apple Pie

Homemade Crust on a Blackberry Pie